
Tutorial add modify water in GTA 5 (water.xml)
In GTA 5 you can modify or add water. I did a lot of testing before changing some existing portions of water, then starting to add new portions and starting to test the various parameters applicable to water in GTA 5.
For each test I created and shared a new map file, and many have asked me how to modify the water? So I decided to write this tutorial.
In this tutorial I show you just the basics for managing the water (mainly add-modify) and how they work and what are the parameters that I've explored so far. It is not absolutely a complete tutorial on all the features and functions of water in GTA 5. There are an infinite number and every day is discovered something new.
I will try to explain everything in the simplest way possible using many images and concrete examples with real files. However for any questions feel free to ask in the comments.
Forgive the bad English, for long texts use the translator.
THE BASICS
First, let's start by saying that the file you're going to work is water.xml. The file is located in "common.rpf/data/level/gta5". You have to export and import with OpenIV.
Inside the file water.xml you find a structure similar to this:
<WaterData>
  <WaterQuads>
    <Item>
      <minX value="-1592" />
      <maxX value="-1304" />
      <minY value="-1744" />
      <maxY value="-1624" />
      <Type value="0" />
      <IsInvisible value="false" />
      <HasLimitedDepth value="false" />
      <z value="0.0" />
      <a1 value="26" />
      <a2 value="26" />
      <a3 value="26" />
      <a4 value="26" />
      <NoStencil value="false" />
    </Item>
The part that interests you is between and.
The first four lines you see represent coordinates (x, y). They represent four points that define a rectangle.
This is the first thing to understand, it can be confusing, but it's actually very simple.
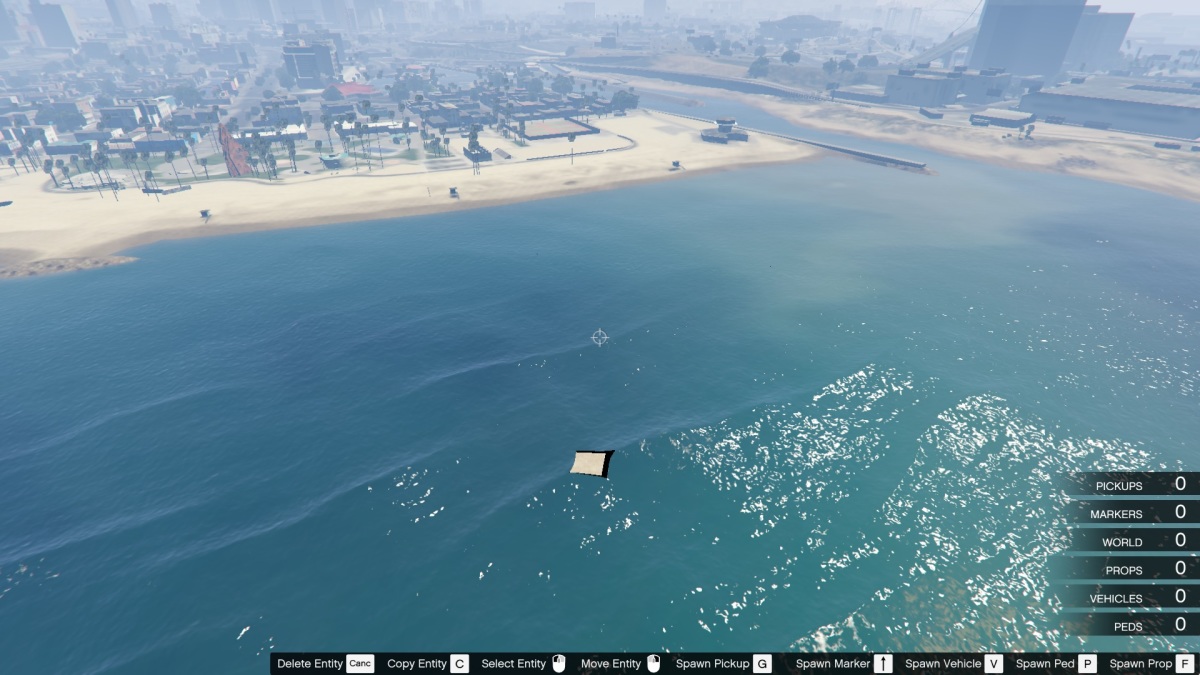
To make you understand I removed from water.xml files, the first set of coordinates. In the picture below you can see what happened.

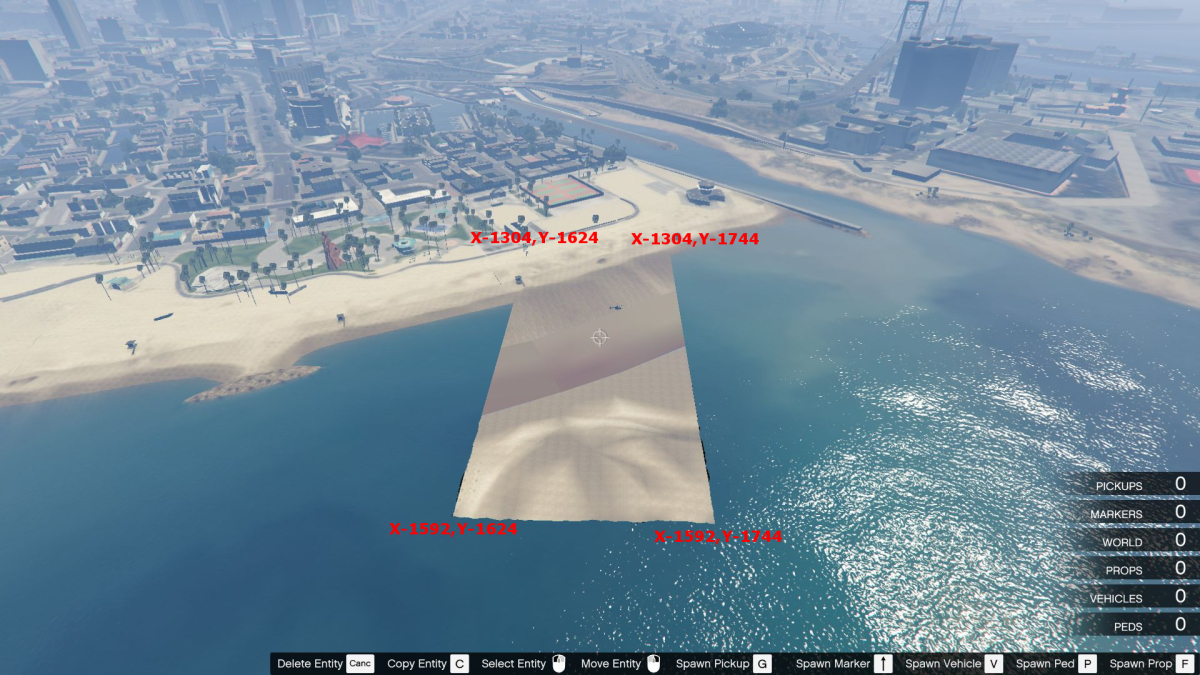
Now that we understand how the coordinates works, the easiest thing we can do is restrict an existing rectangle.
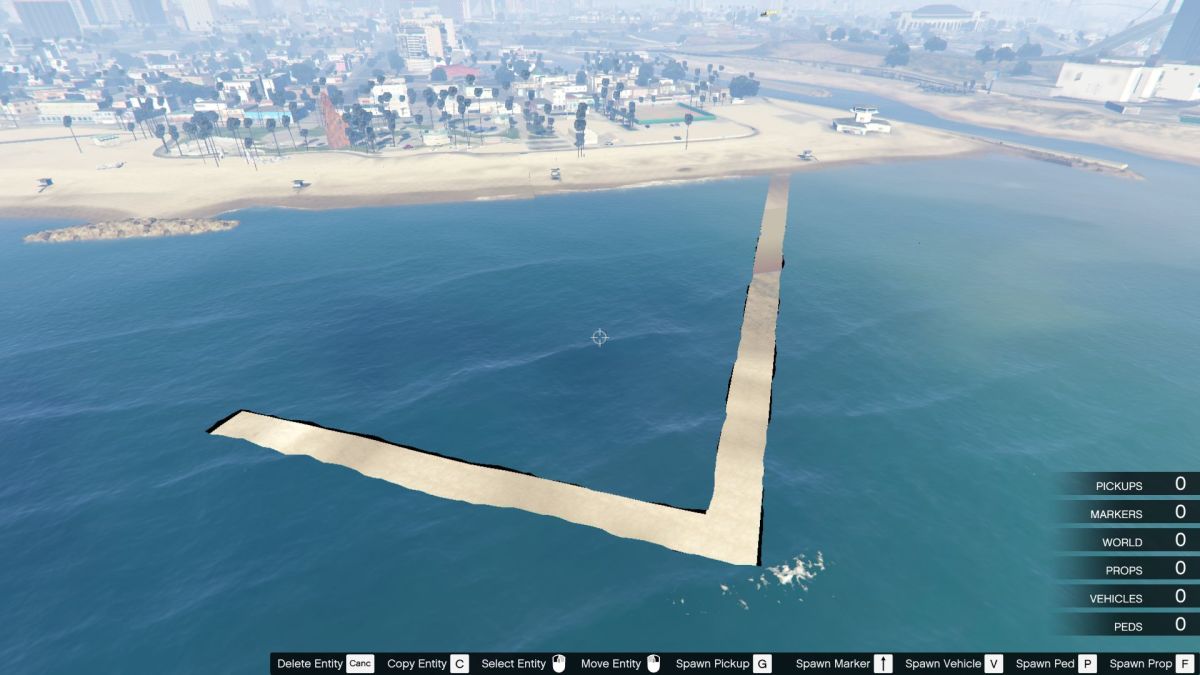
In this case I only changed in the previous code minX from -1592 to -1582, and minY from -1744 to -1734.
In my early experiments I created the graphics, they helped me a lot to understand what I was doing and what coordinates to use in the file.
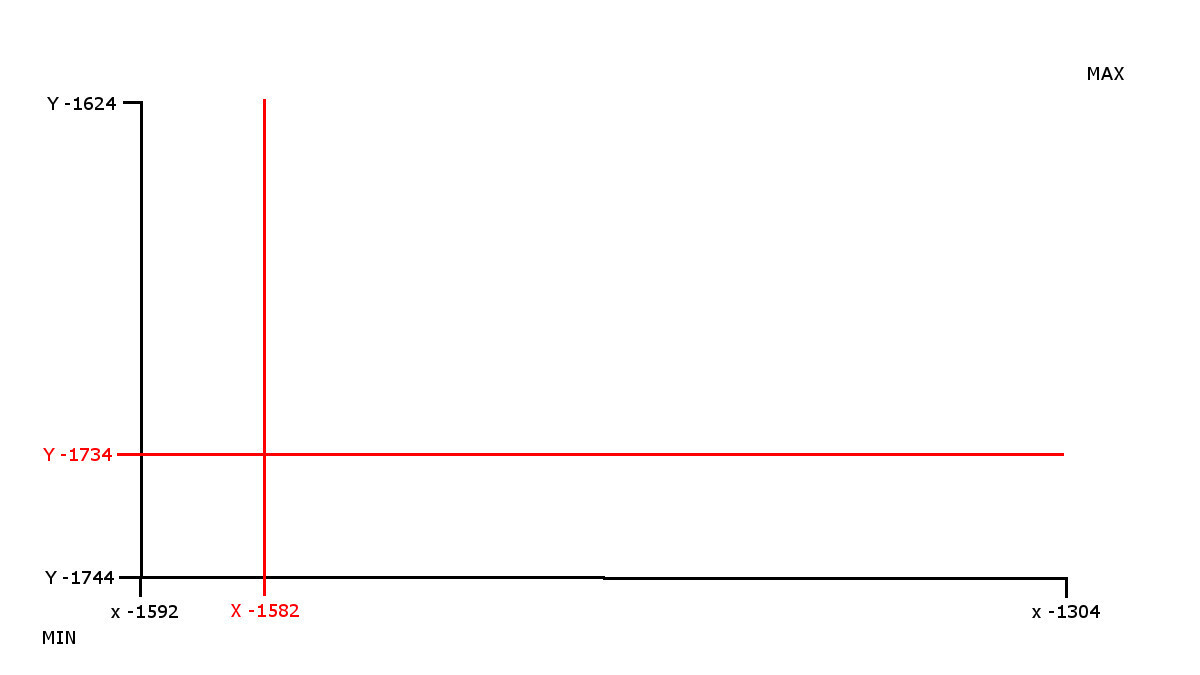
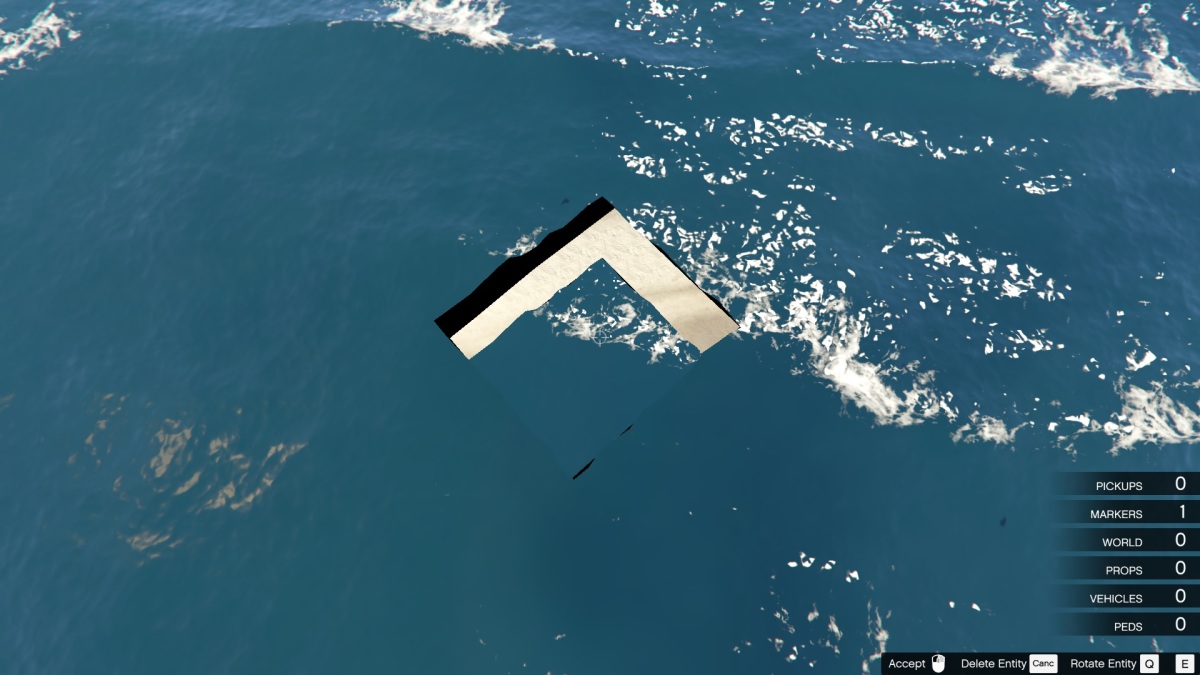
This first graph shows the changes I made to my water.xml file.
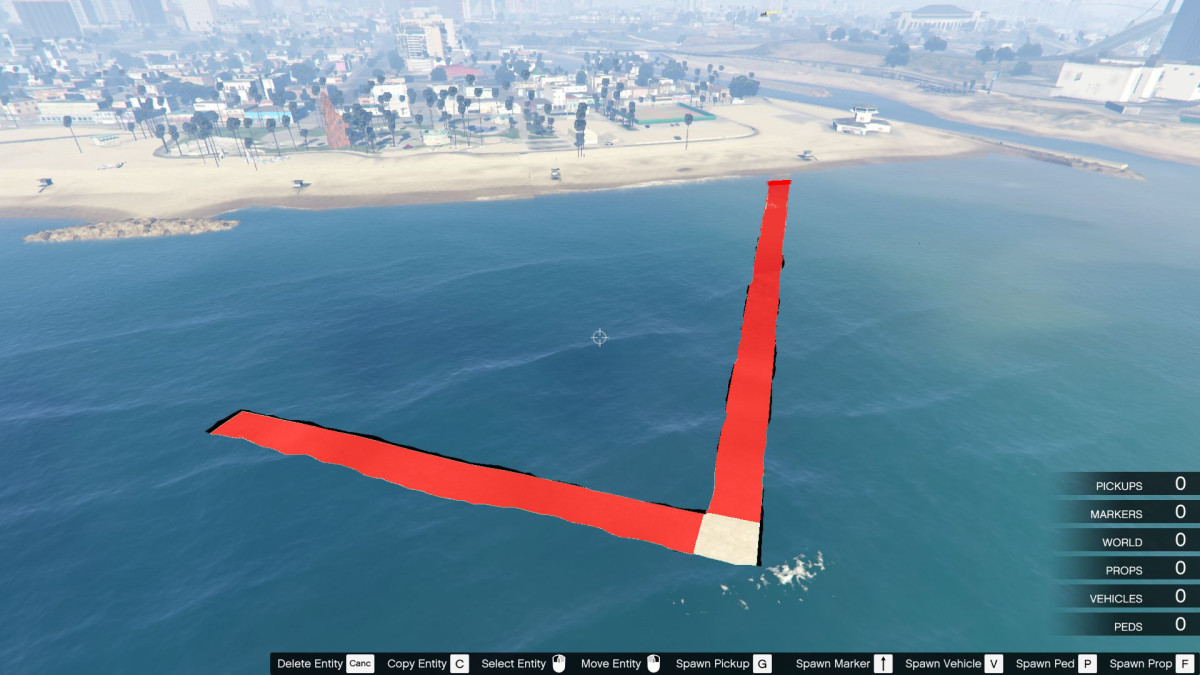
With these changes, I got an area in the shape of "L" wide 10 meters/units. Not very useful, but a first step.
1° EXPERIMENT - Hole in the water
A most useful thing would be to have only a waterless square, where building something.
To do this we add 2 new rectangles, that will fill the empty spaces between X-1592 and X-1582, and between Y-1734 and Y-1744.
Then add these new lines in the file water.xml
<Item>
      <minX value="-1592" />
      <maxX value="-1582" />
      <minY value="-1734" />
      <maxY value="-1624" />
      <Type value="0" />
      <IsInvisible value="false" />
      <HasLimitedDepth value="false" />
      <z value="0.0" />
      <a1 value="26" />
      <a2 value="26" />
      <a3 value="26" />
      <a4 value="26" />
      <NoStencil value="false" />
    </Item>
<Item>
      <minX value="-1582" />
      <maxX value="-1304" />
      <minY value="-1744" />
      <maxY value="-1734" />
      <Type value="0" />
      <IsInvisible value="false" />
      <HasLimitedDepth value="false" />
      <z value="0.0" />
      <a1 value="26" />
      <a2 value="26" />
      <a3 value="26" />
      <a4 value="26" />
      <NoStencil value="false" />
    </Item>
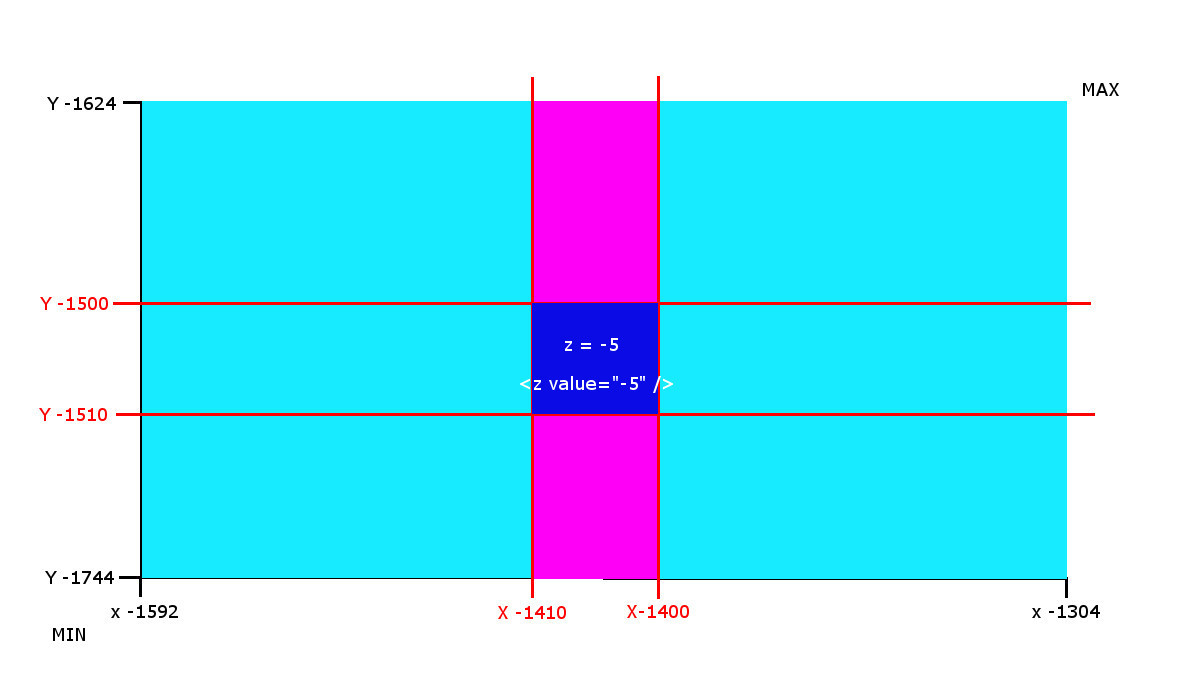
In the chart I highlighted in blue areas of the new created rectangles. Observing the coordinates in the graph is easy to understand which new coordinates to enter in water.xml file.

P.S. a small reminder, the negative numbers, -1 is greater than -10. So, for example, Xmin = -10, Xmax = -1, if invert the coordinates, nothing works.
What I got is a square without water in the sea just in the corner of the original rectangle:
and what can I do with this? For example this:

This was my first test, a water.xml files with changed coordinates and one file for Map Editor for the building. It 'was a first real experiment to understand how everything works.
The empty square does not have to stand in the corner, you can completely eliminate the rectangle with the original coordinates, and create your new 4 rectangles, leaving a blank space where you want.

This chart is an example of how they could be subdivided new rectangles.
2° EXPERIMENT - Deep waters
As you can see in the first experiment, the water is completely removed, from the bottom to the surface.
The second experiment were the deeper waters. I moved a little further offshore into deeper water, but in this case I did not completely eliminate the water, but to create two water levels. The normal sea level (Z = 0) and a new level within my square further down.
To do this, I created the usual rectangular structure as previously through, but instead of leaving a hole, I created a water area even with the coordinates of the square. In the latter set of coordinates I have changed the parameter <value = "0.0" />. 0.0 is the normal sea level, more or less varies the height of the water level.
What I got is this:

A second home with a submerged diver entrance.
With this second experiment I noticed several anomalous behavior of water. First and perhaps most important, the two water levels are confusing. In the sense that it is the player that animals left free to roam in the area, they seem to have problems with the second level.
For example, diving with the player from the terrace of the building, it sinks into the water far more than usual. Whales as they swim, without apparent reason, suddenly die, as if suddenly then find that on the mainland, although well away from the second water level square.
Some similar problems, I have encountered them in other tests, getting too close to the shore, maybe they depend on the depth of the sea floor, perhaps even more moving off are resolved. At the time I did not have time to do other tests about. In the future I will make new tests.
3° EXPERIMENT - AQUARIUM
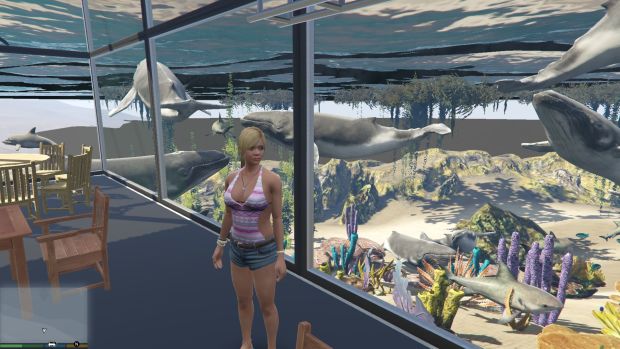
In my third experiment I started from the first experiment files. GTAV Underwater House
I modified water.xml to leave a road to the shore, converted the building into an aquarium and populated the surrounding area of a myriad of marine animals. This mainly to understand where they were going to die. Forcing them to swim in a small area, some animals are approaching the shore and tend to die beached.
I therefore think that the problems of the second experiment, are attributable to the fact that the second water level is perhaps too close to the seabed. In the future I will make new tests to confirm or refute this thesis.
4° EXPERIMENT - FRANKLIN'S LAKE

This time I wanted to try adding water to dry land. Initially the idea was to make a swimming pool, but the water was a bit too agitated for a pool, was more suited to a lake, so I made it a lake.
As usual I created a series of new rectangles in water.xml, but set in this case the value Z = 166. The water level has risen up to the Franklin Villa garden.
Everything related to the water seems to work perfectly. The only "bug" that I encountered in size.
The lake is located above the city. All around the lake I put a series of billboard_13 (as editor) to delimit the borders. However, being the very large lake the most distant elements are not rendered.
The AI does not recognize the area as water and allows cars and pedestrians to get into it quietly, in a moment find themselves under tens of meters of water.
So people you see swimming in the lake, are not tourists visiting, they are poor motorists who try to save themselves from drowning.
On the surface, the effect is nice, but going underwater, you see that the bottom is littered with corpses ...
The Type parameter
In this experiment, I also tested the parameter <Type value="0" />. Initially it does not seem to change much the surface is always the same, always the same waves, always the same transparency, you only notice some errors in the form.
However, as I prepared the photos I have rolled away the view and noticed a scheme.
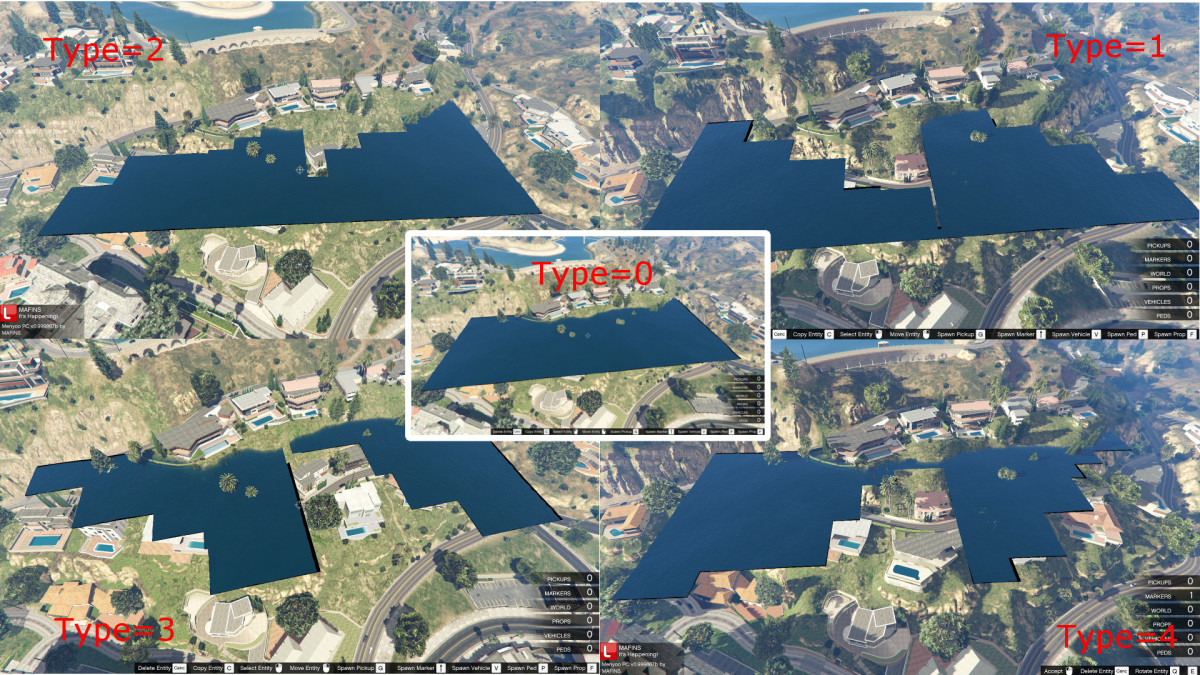
They seem to be gradations (0, 90, 180, 270). Probably useful when the rectangular shape interferes with other elements. At the time I did not do other tests. However, the parameter appears to do this.
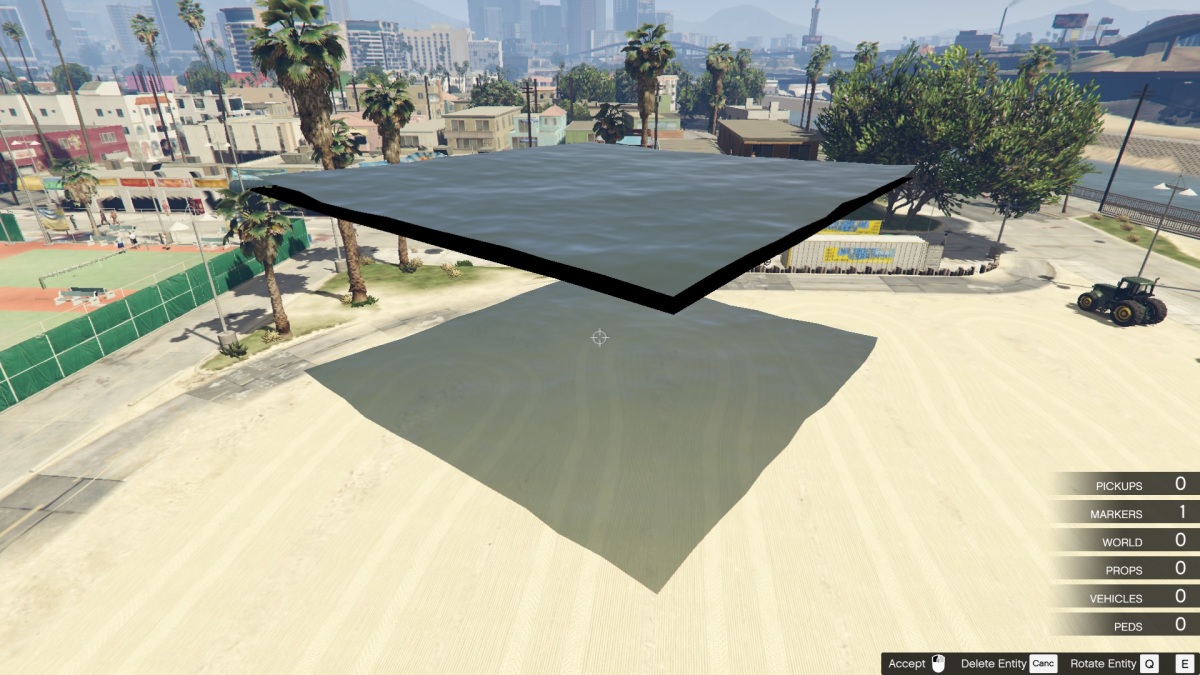
5° EXPERIMENT - VANILLA UNICORN POOL PARTY

GTA 5 Vanilla Unicorn Pool Party
This time a pool ... at Vanilla Unicorn.
To make a pool necessarily serve calmer waters.
I have found, always in water.xml file, several lines below, a new structure:
<CalmingQuads>
<Item>
      <minX value="135" />
      <maxX value="154" />
      <minY value="-1328" />
      <maxY value="-1300" />
      <fDampening value="0.01" />
    </Item>
In this structure the first 4 values are the usual coordinates, the value <fDampening value="0.01" /> attenuates the waves.
For now I did some tests only. I'm not sure what the minimum and maximum values of this parameter.
In the Vanilla Unicorn pool I am managed to mitigate much the waves, but honestly not what I wanted.
however, it can be a very useful parameter in the sea, to create a marine or areas with calm waters.
Perhaps this parameter is linked to other parameters, for now I have not had time to investigate.
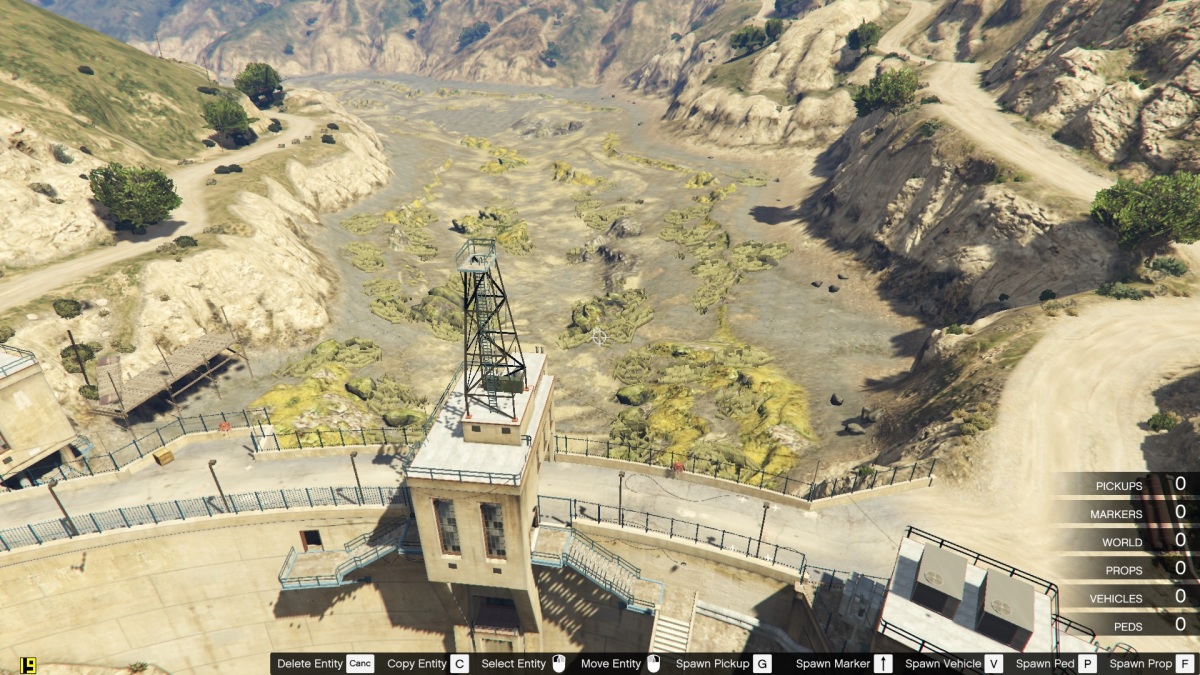
A very strange thing, changing the water a vanilla unicorn, disappears the water of Tatavian dam. I have no idea why ... is very far from the coordinates I have changed ... maybe some problems with parameter Z.
The parameter HasLimitedDepth
In water.xml files we find also the parameter <HasLimitedDepth value="false" >.
It seems easy to understand what he does. However, setting the value to "true", nothing happens.
Fortunately our friend mixtro has spent time there, and created a new parameter linked to the first.
The new structure becomes for example:
<HasLimitedDepth value="true" />
<LimitedDepth value="10" />
And it works! With this structure it is possible to limit the depth of water.
So you can for example have some water over your head as you walk on the sea floor ... the possibilities are endless.
For now I only did a couple of tests, but I saw that it is even possible to have two water levels one above the other, and in the middle the air.
For now, I recently found out that possibility, I do not have much to show. In future I will definitely some other tests with concrete examples.
A huge thanks to mixtro for discovery.
P.S. Strange thing, do not seem to work at the Alamo Sea.
6° EXPERIMENT - Underwater Base

Underwater Base with water above and below.
I found the time to do a test with the new parameter created by mixtro. As a base submerged with water both above and below.
I moved as much as possible in deep water, in the hope of solving some of the water problems encountered previously.
They not resolved. Good or bad everything works, but the two water levels continue to cause problems.
Diving go down hundreds meters, the dolphins make jumps of 180 meters and then died mysteriously, the submarine crashes into the seabed.
I also noticed a new strangeness within the base the view of the player continues to be moved, as if it were under water. Nothing serious, but in the long run to be a bit of seasickness.
But apart from the usual water problems, the new parameter created by mixtro works very well.
If I find the time even I'll do a water test only on, to see if any weirdness is resolved.
7° EXPERIMENT - Trevor submerged secret warehouse
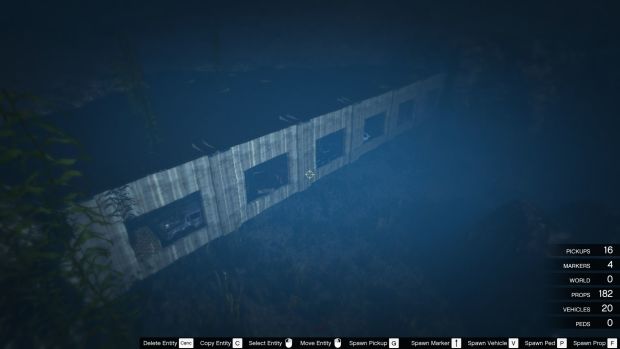
Download GTA 5 Trevor submerged secret warehouse
An experiment with water just above. I used the HasLimitedDepth parameter.
The initial idea was to create an underwater warehouse, near the shore with hidden access by sea.
That is, I wanted to create as usual the warehouse with water just above, using the parameter HasLimitedDepth etc etc etc.
Then create a "water road" by setting the parameter LimitedDepth value = "- 1". leaving a meter of water on the surface, can be crossed with a car, a motorcycle, a tank etc.
But, unfortunately it does not work. I have done many tests with different values ââ¬â¹Ã¢â¬â¹in different places, but it did not work.
Then I realized that even in the warehous the parameter LimitedDepth value = "- 10" does not work. In the sense that you can not set the depth of the water level.
Setting parameter HasLimitedDepth to "true" the water stops at a certain depth, but does not follow the directives of "LimitedDepth value =".
GTA decides where have to stop. I do not know why this happens, maybe the usual problems of little depth, a little off, wrong place, do not know.
In the future, if I have time I will do other tests.
Other parameters
Someone will have noticed that there are other parameters in the file water.xml
      <IsInvisible value="false" />
      <a1 value="26" />
      <a2 value="26" />
      <a3 value="26" />
      <a4 value="26" />
      <NoStencil value="true" />
What do these parameters? I do not know...
I did a lot of tests, in different places, with different values, but although some seem very intuitive, does not really do seem to do anything.
Any change value does not seem to make any visible change. Surely there for a reason, but I have not yet figured out what it is.
If anyone can figure out what they do, let us know.
waves
In water.xml file exists also this structure
    <Item>
      <minX value="1664" />
      <maxX value="1988" />
      <minY value="-120" />
      <maxY value="132" />
      <Amplitude value="0.1" />
      <XDirection value="-0.603208" />
      <YDirection value="-0.797584" />
    </Item>
As you can guess defines coordinates, direction and height of the waves.

In my tests I noticed that the effects of this code can be seen on a large scale, on very large areas. I think only functions on level 0 of water.
Transparency/Dirty
I know that there is somewhere something that defines the transparency/dirt of water. Because I have seen the effects on the seabed.

At the moment I have no idea what it is or where it is.
Rating: 5 out of 5 by 41339 visitors